
The Color Purple
Playing with colors

I’ve recently been experimenting with the color purple. Well more of technique experimenting really. The truth is I hate painting. And as good as a nice milk paint or linseed oil paint finish look I dread the process, and the cure time is killer. Maybe this would be different if I had a finishing room and pieces could sit there for weeks while other projects are underway but that’s not my reality at the moment.
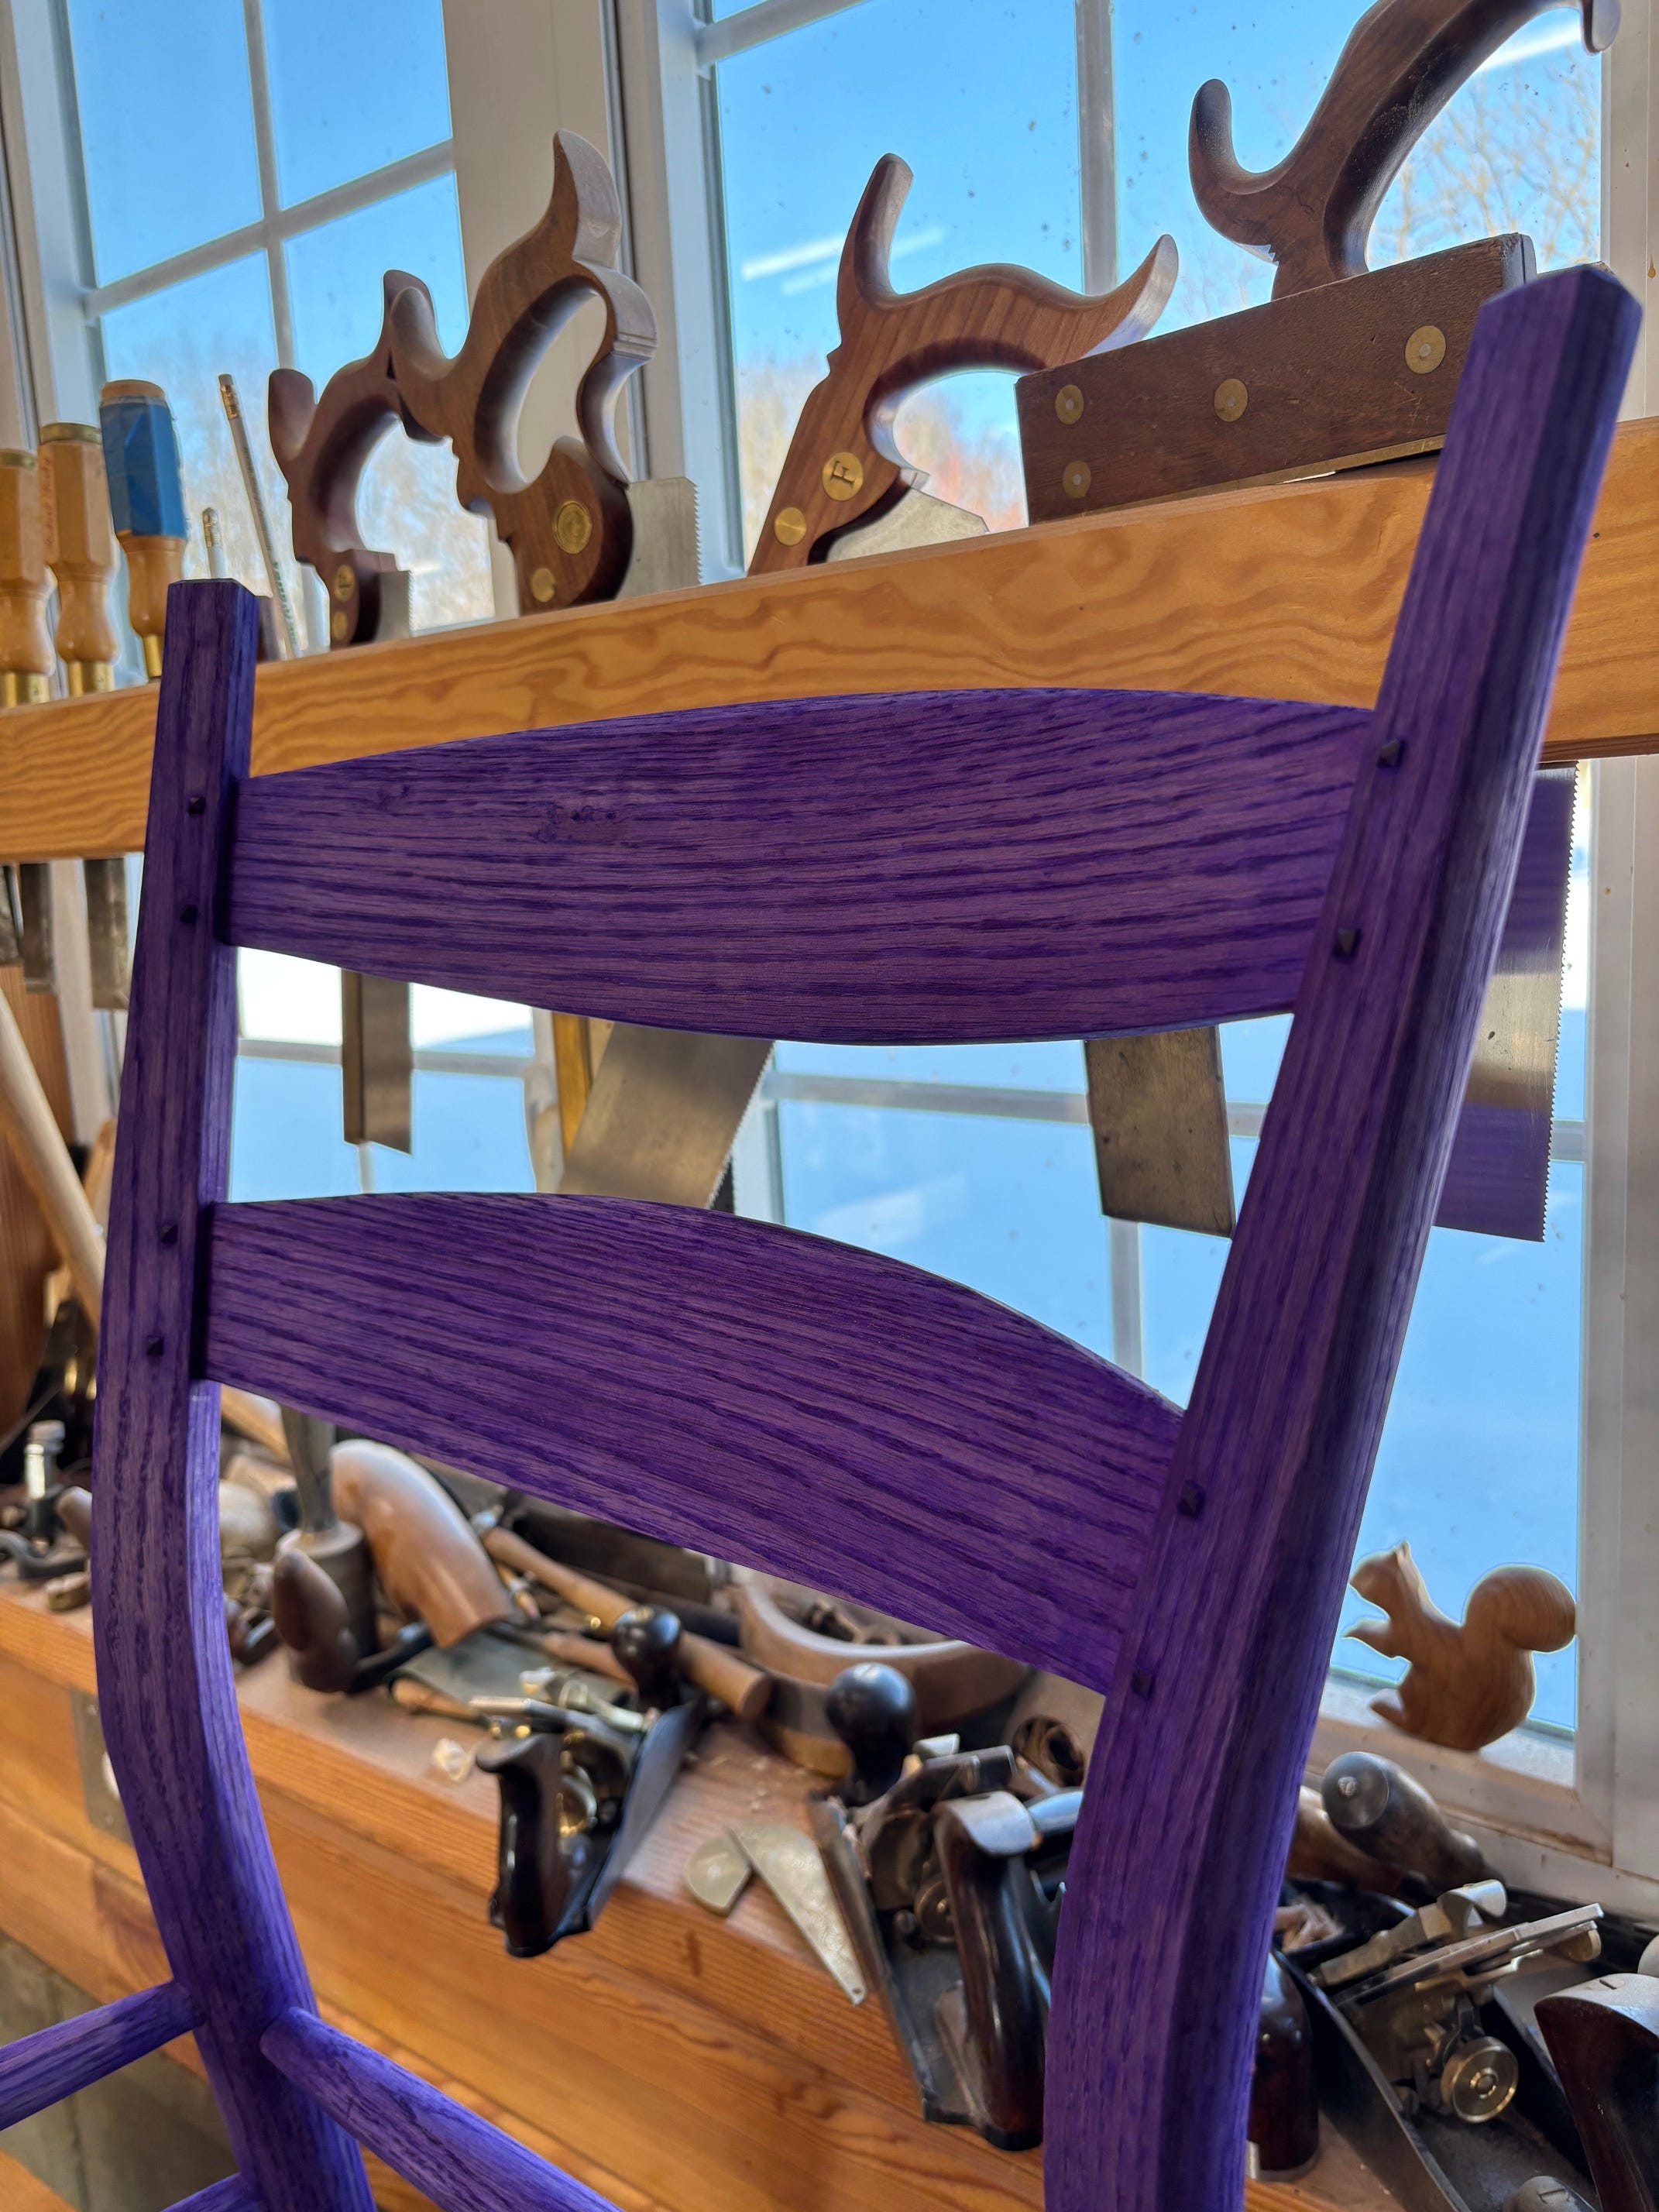
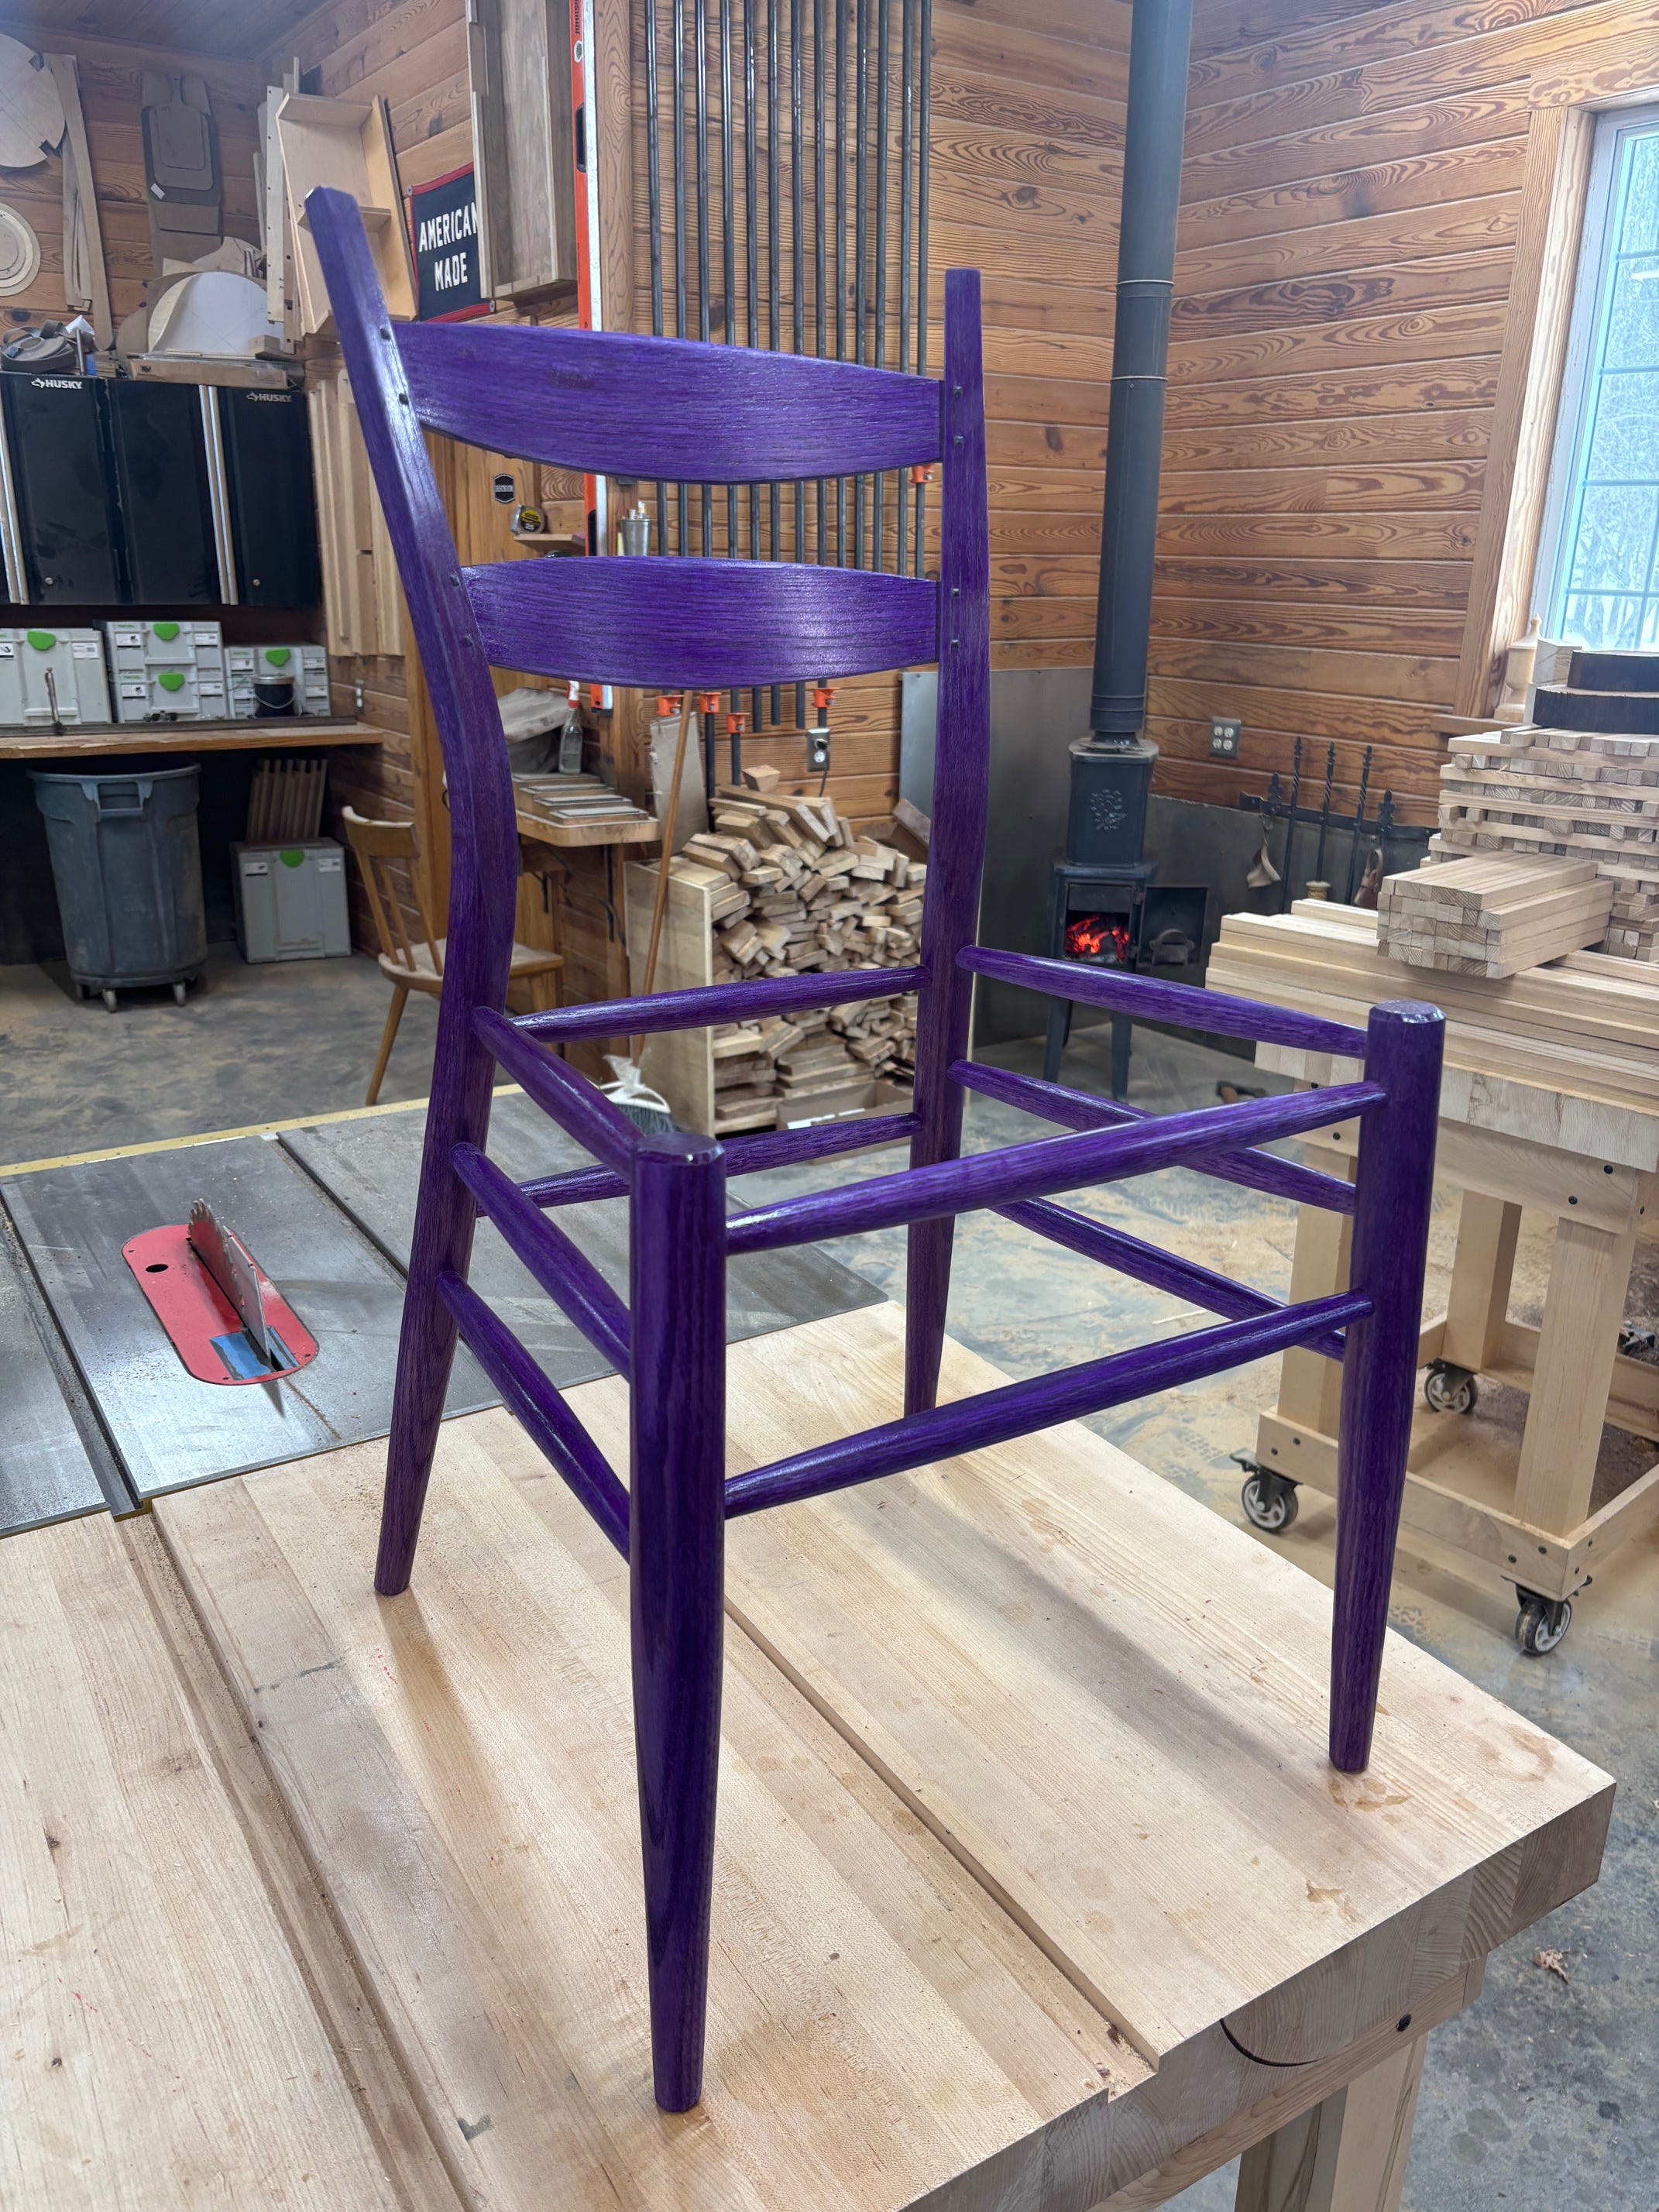
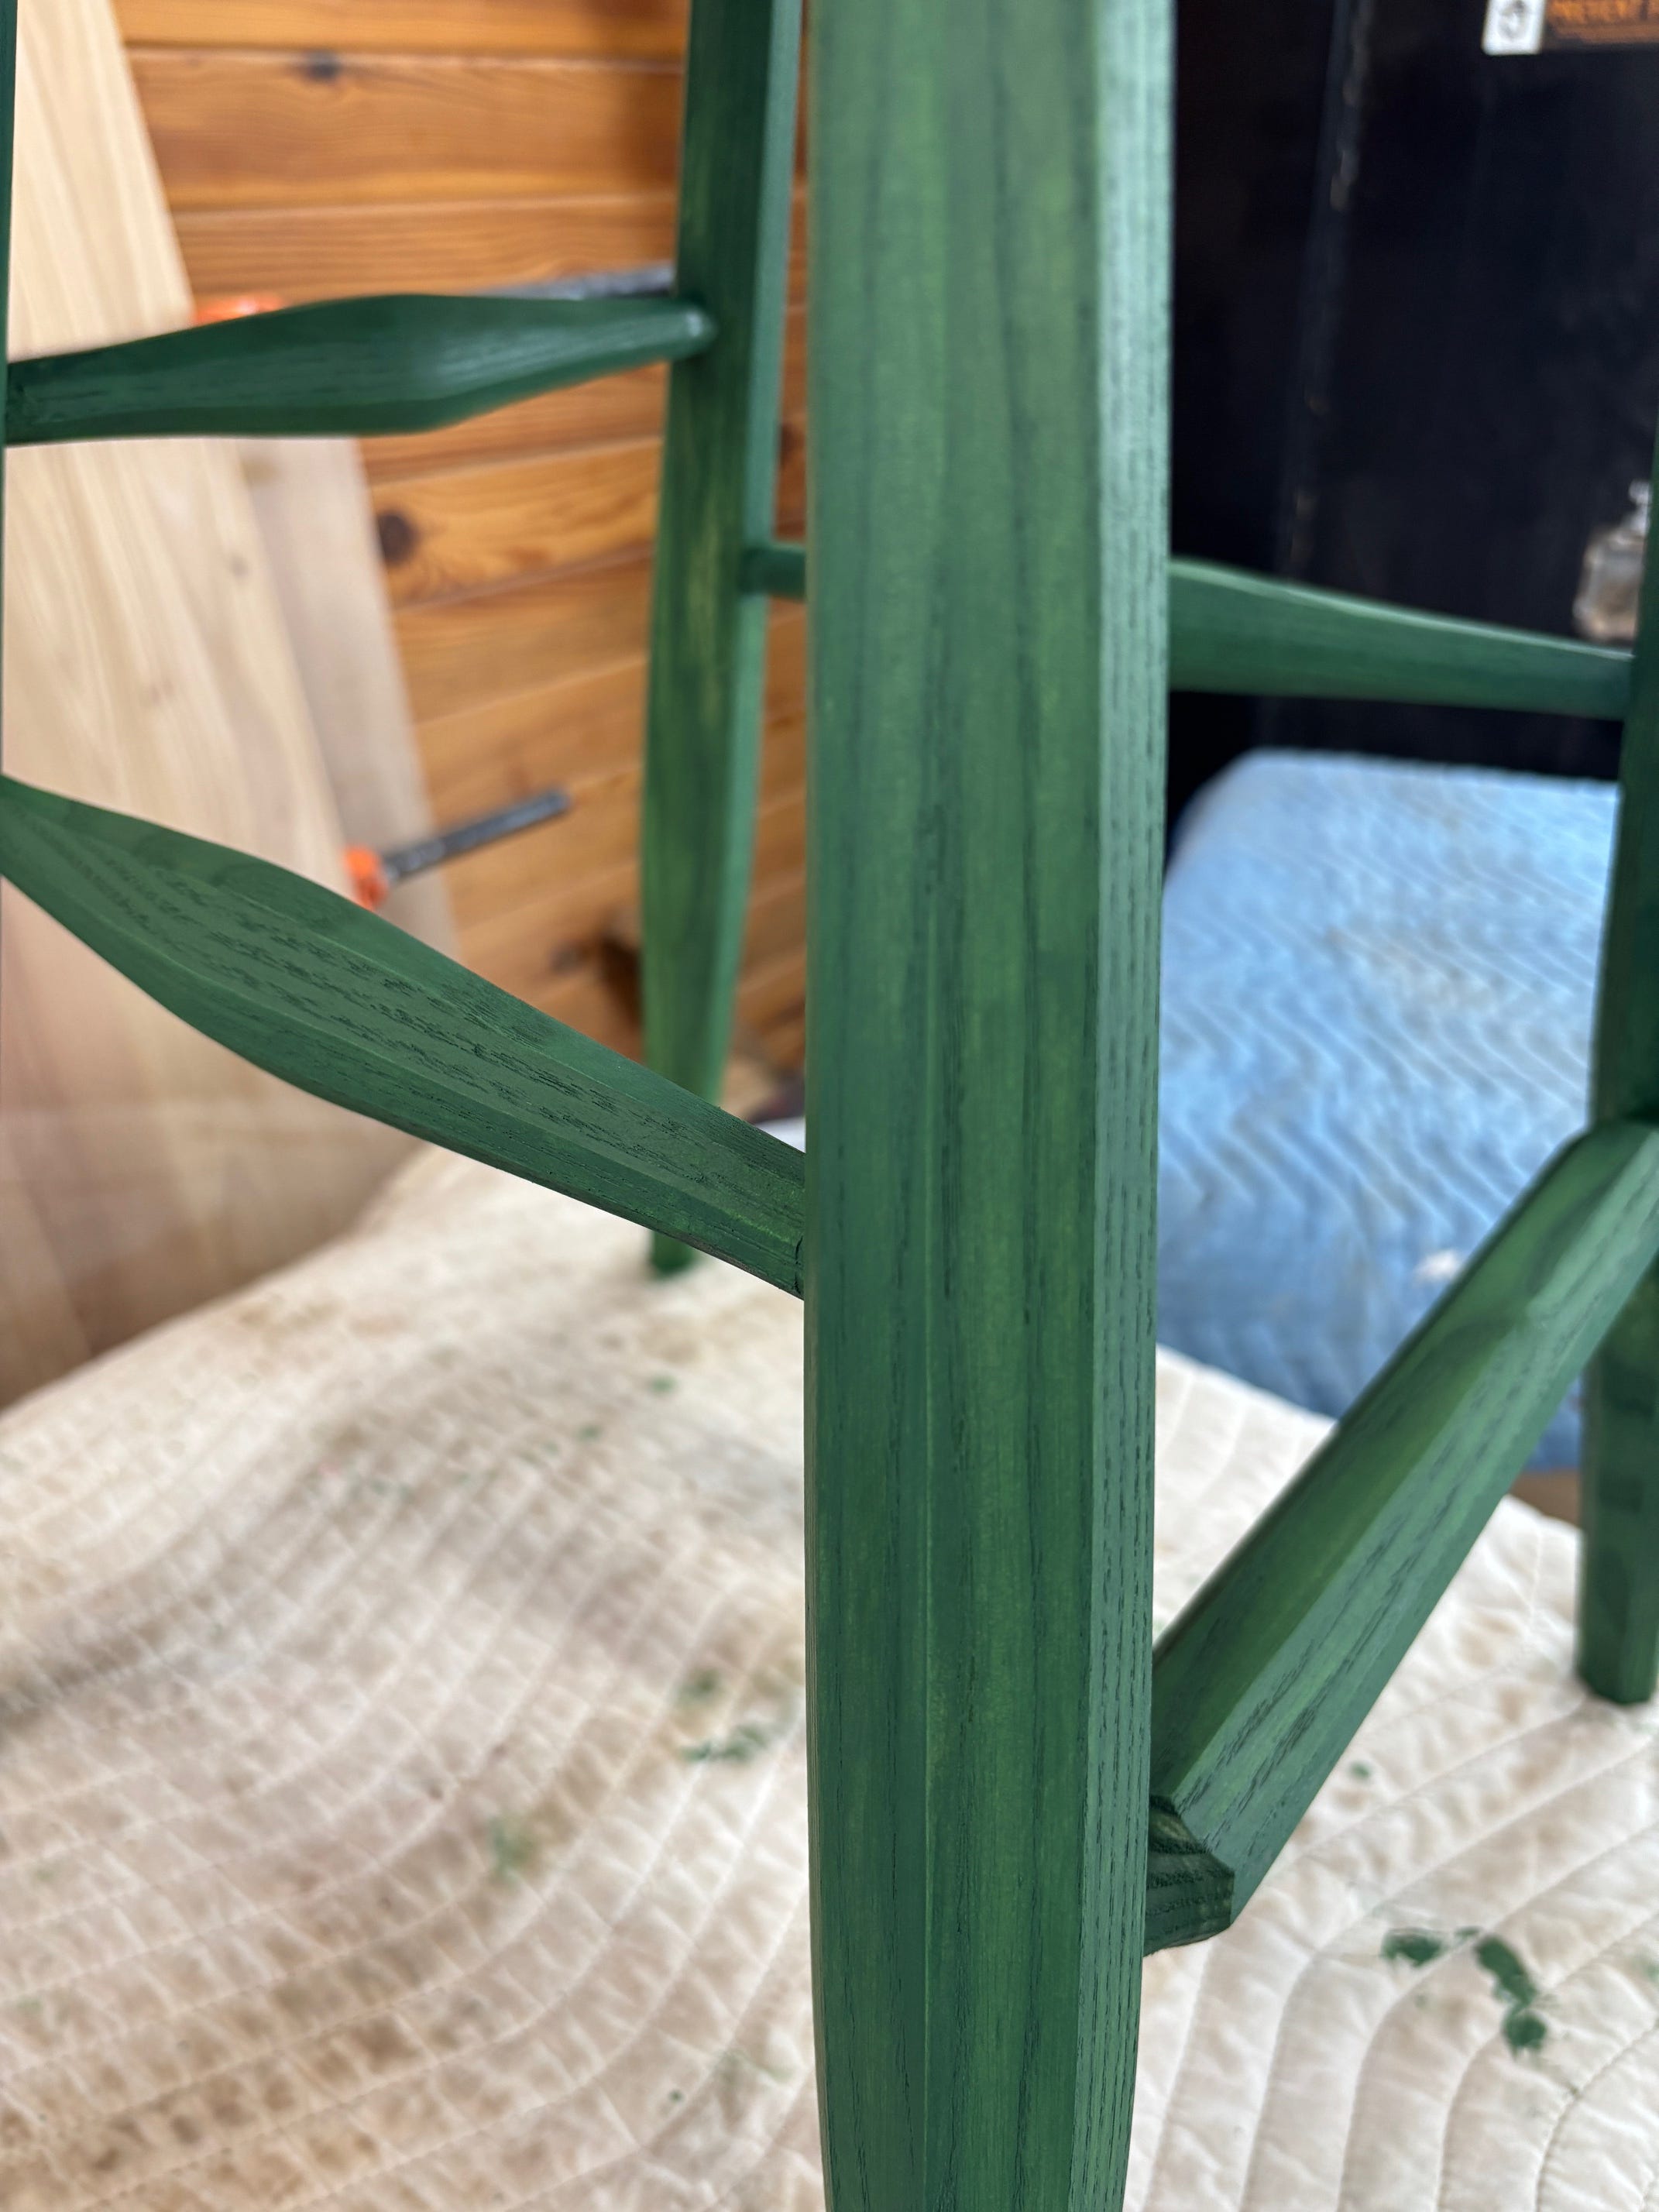
The visual effect I’m after is color that will still show the wood grain, specifically in open pore species like Oak, Elm and Ash. I’m also looking for flexibility to mix a variety of colors and tones. So I have been experimenting with dye. There are lots of different dyes available and most of them dilute in alcohol or water as their binder making dry time basically as long as it takes for the water or alcohol to evaporate. For me this is as ideal as it gets for a fast dry time.
To start I reached for the easy solution, Aniline dye. Aniline dyes are easy to use and produce a large spectrum of brilliant colors. However they are notoriously not UV stable meaning UV rays or sunshine breaks down the color over time. I have a carving mallet made by my friend Albert that he dyed a gorgeous purple and stabilized in epoxy. It lives on the window sill above my workbench and after several years the purple has faded to a dull grey color. Before exploring every type of dye I decided to focus on application and see if I could get the results I wanted first. So I just grabbed some Transtint aniline dye.
Application
With a choice of alcohol or water I’ve opted to use alcohol so as not to raise the grain which would add sanding steps. Denatured alcohol is readily available for me here in VA (it is banned in many states). But a high proof grain alcohol Like Everclear will also get you there.
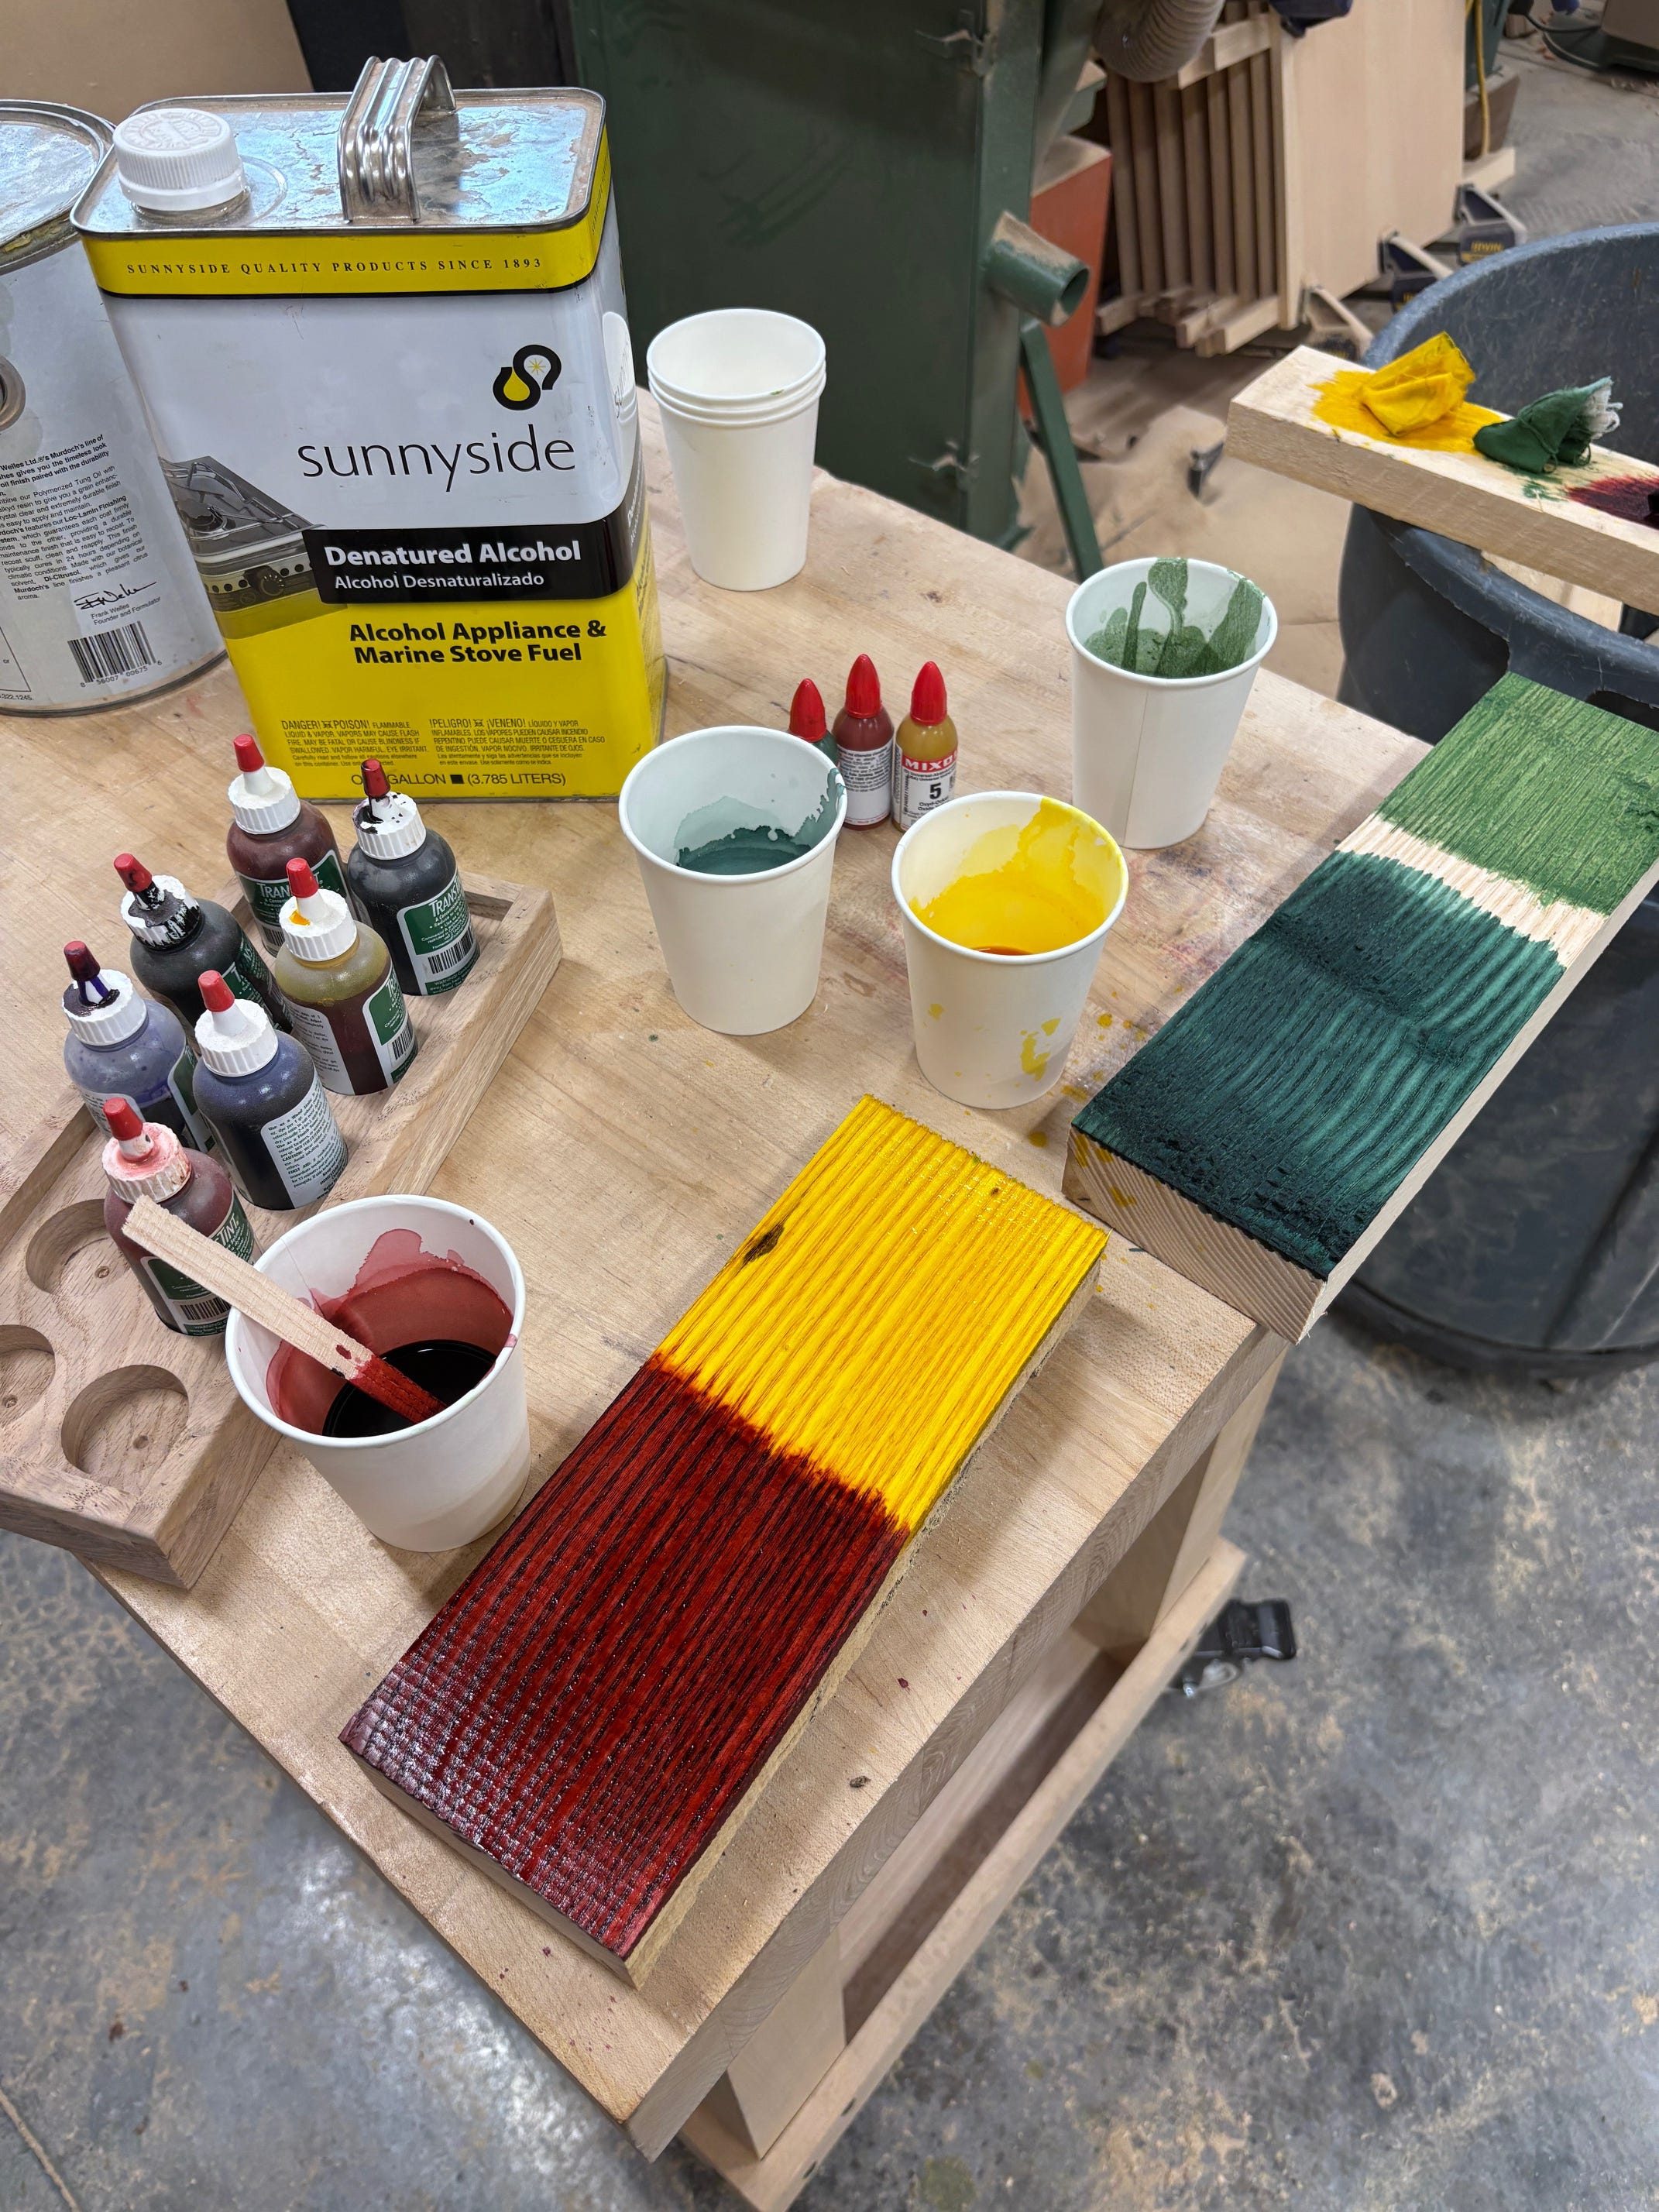
Mixing the dye is as easy as poring a few table spoons of alcohol into a paper cup and adding 4-6 drops of dye. The dye is very strong so you do not need much. I test a bit on a scrap to check its intensity and tone and then simply wipe it on my piece with a rag. It dries almost instantly so it goes quickly. If a spot dries as a weird drip simply run back over it with wet dye to smooth it out. Once I have a coat on I let it sit 5min and then decide if I want a second coat to deepen the color. Which then is just wiping on another coat.
Once its dried the next step is getting the dye locked in so it does not rub off on your hands. For me shellac works best for this. While I don’t particularly care for shellac as final finish I love shellac as a grain sealer. It is a fast way to lock things in. Virtually any finish will bond to shellac as a top coat which makes it ideal. With shellac also being alcohol based you do have to be careful with the first seal coat not to get a run as it can leave a streak in the dye.. For me rather than cutting and dewaxing shellac just to seal the grain I’ve been simply using aerosol shellac and doing 2 coats lightly buffing with a scotch bright between coats. If mixing and using shellac is new to you Mike Mascelli recently wrote a great article in Fine Woodworking that will get your started.
Once the dye is sealed you can top coat with anything you like. I do my normal wiping varnish top coat with no issues.
Waxes
Once the top coat is dried I normally do a buff with paste wax. Another element of exploration is colored waxes. With ring porous woods like I’m using in my chairs the grain despite being sealed off is still fairly open. You can get a second variety of color tones by using colored waxes that sit in the open grain contrasting with the dye color similar to a glaze. This is generally known as cerusing. Applying it you push it into the open grain and come back to buff most of it off the surface leaving it behind in the grain for a color contrast.
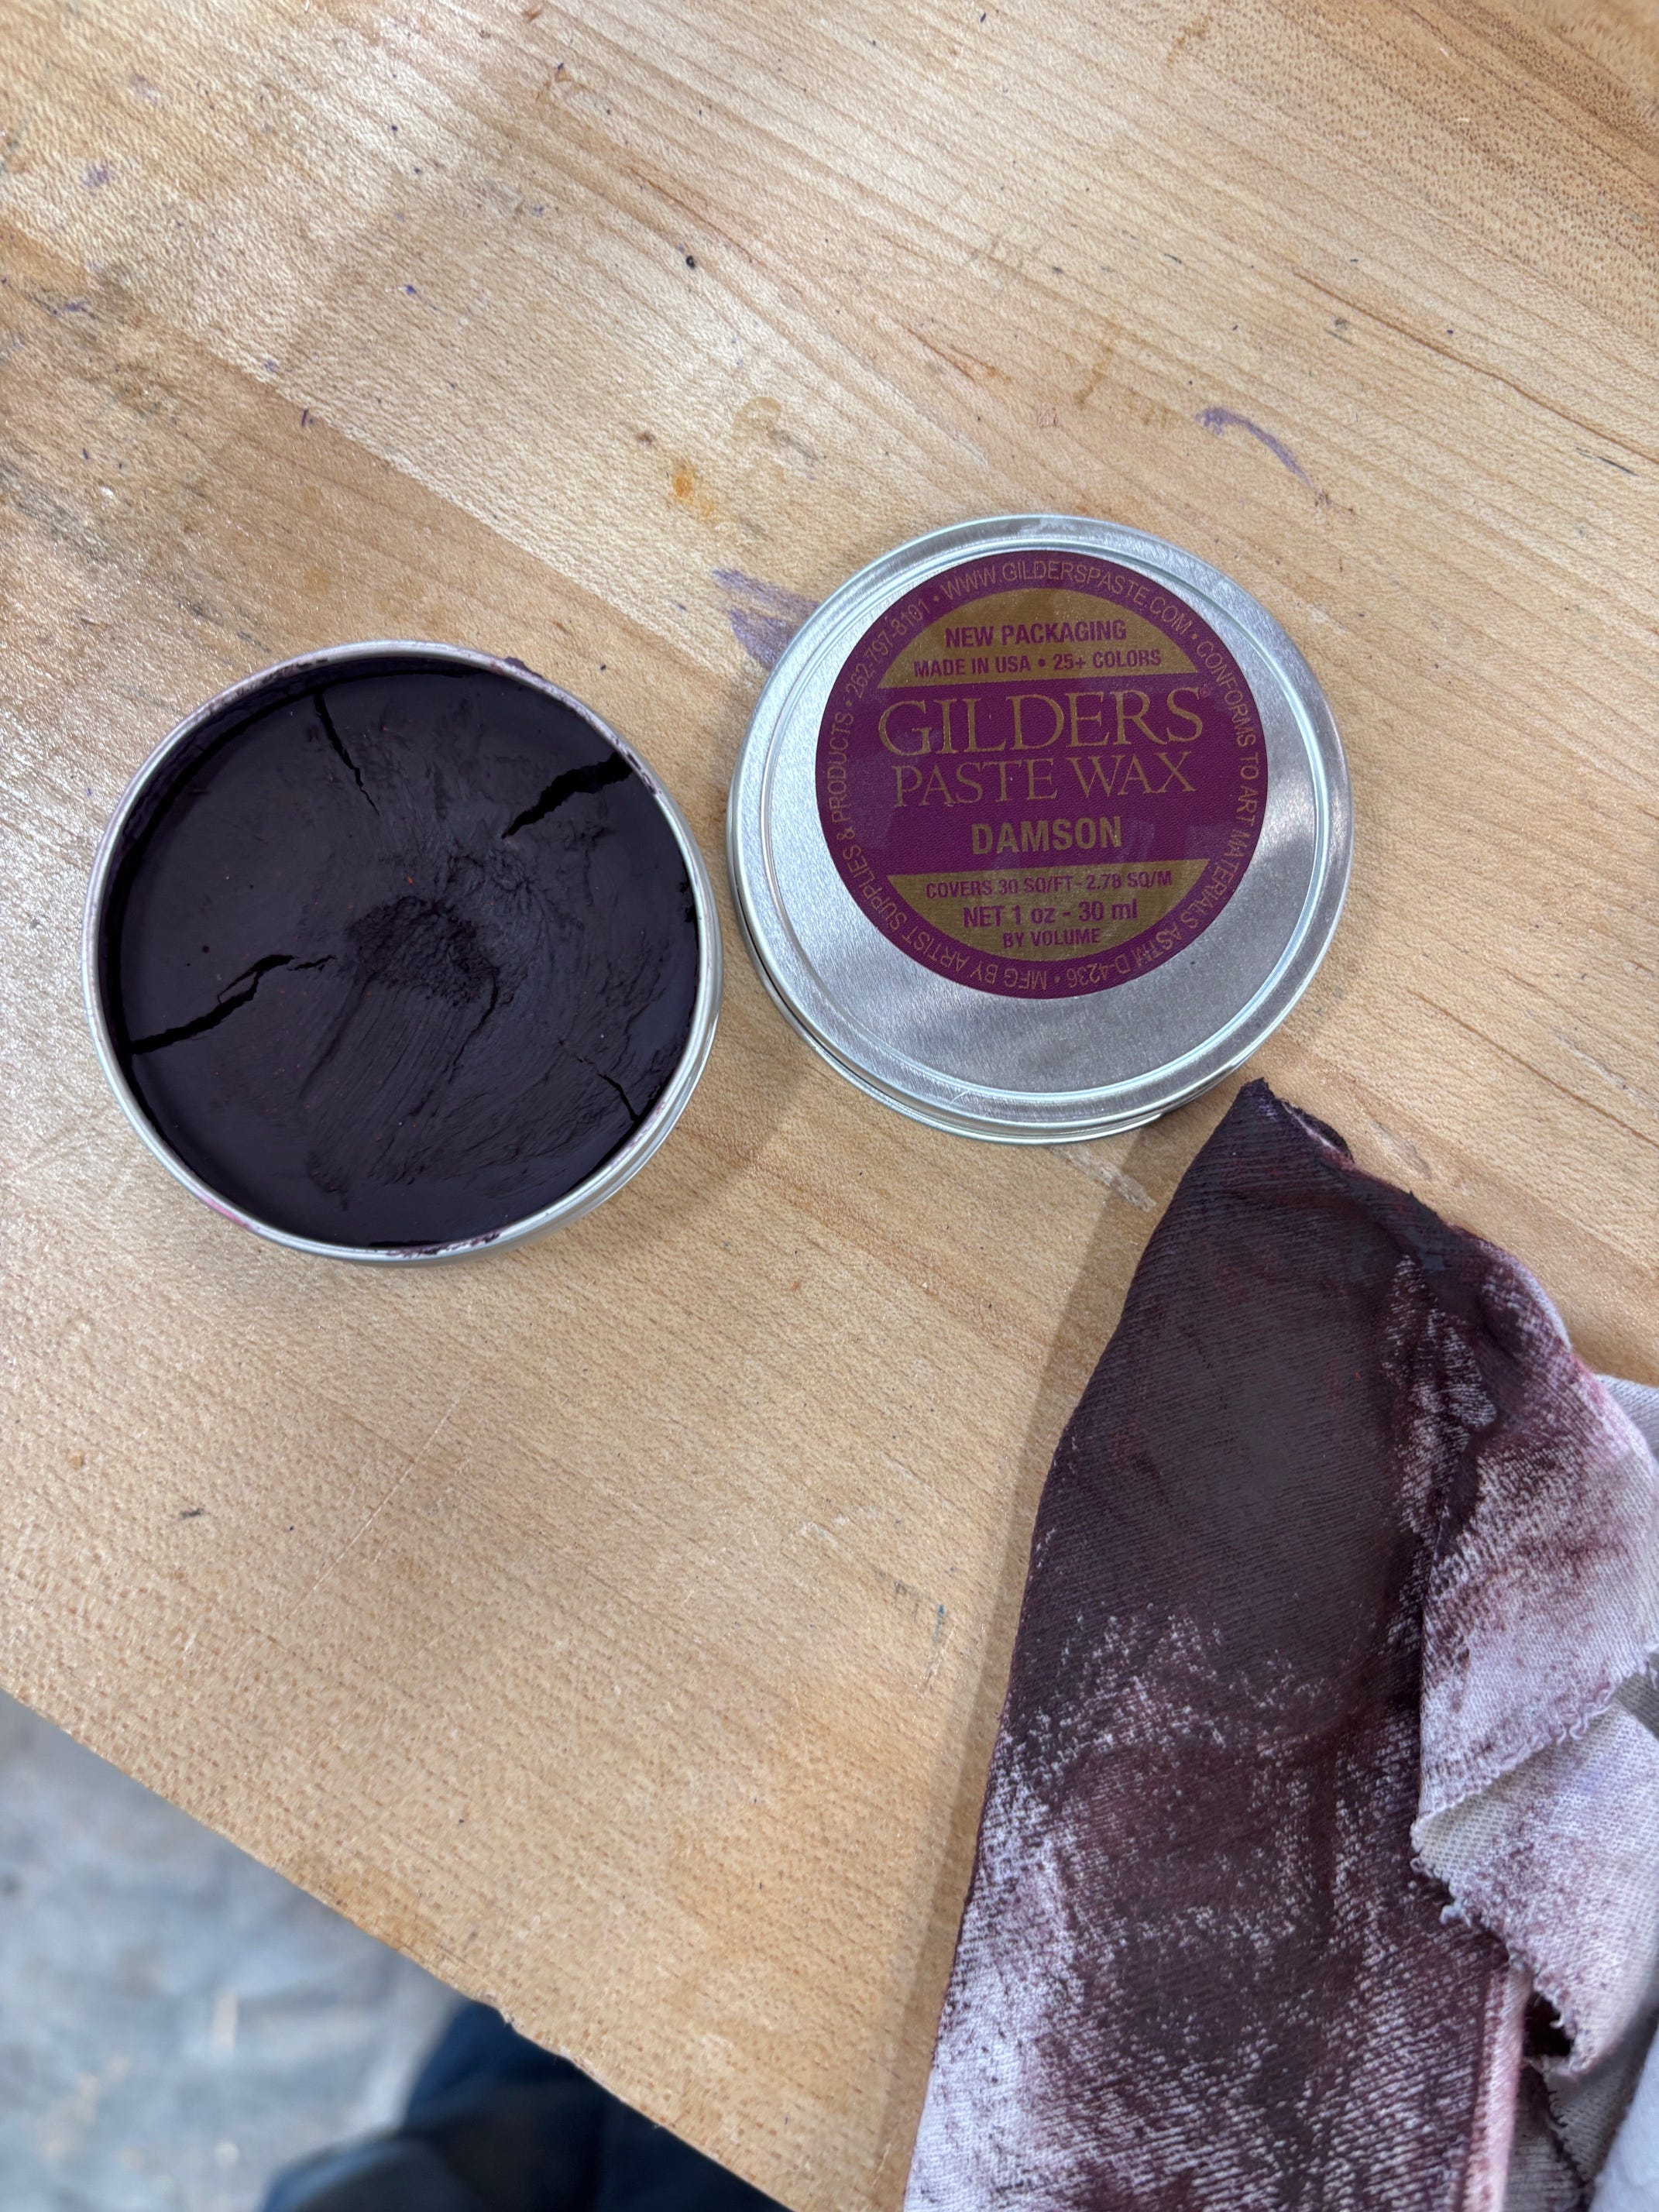
One of my favorite waxes is Lake One I was introduced to it by an employee of mine who does antique repairs. Lake One has 7 different colors and dries very hard. Unfortunately it is now very difficult to find in the US but hands down is the most durable wax I’ve ever used. Liberon is another great wax with a more limited color selection. I particularly like their black wax and their liming wax for a white wax. For the broadest range of colors I use Gilders Wax, It uses acrylic pigments and metalics to achieve the broadest range of colors available in a finishing wax that I am aware of.
Oxides
While I’m very happy with my process so far I realize the Transtint aniline dye is not color fast and will fade over time. The most color fast dyes are oxide dyes. Oxide pigments are made from ground up minerals making them very color fast and resistant to fading. Mixol has a selection of oxide dyes designed for exterior use which seems to be the most straightforward off the shelf option. After ordering some the first thing I notice is the evident grit or fine pigment powder in the dye. In mixing it with the alcohol I have found it works best to put the dye in the cup first and then slowly work in the alcohol to prevent that fine pigment powder from micro clumping.
It does not penetrate quite as deep as the aniline dye but builds up a nice strong color.
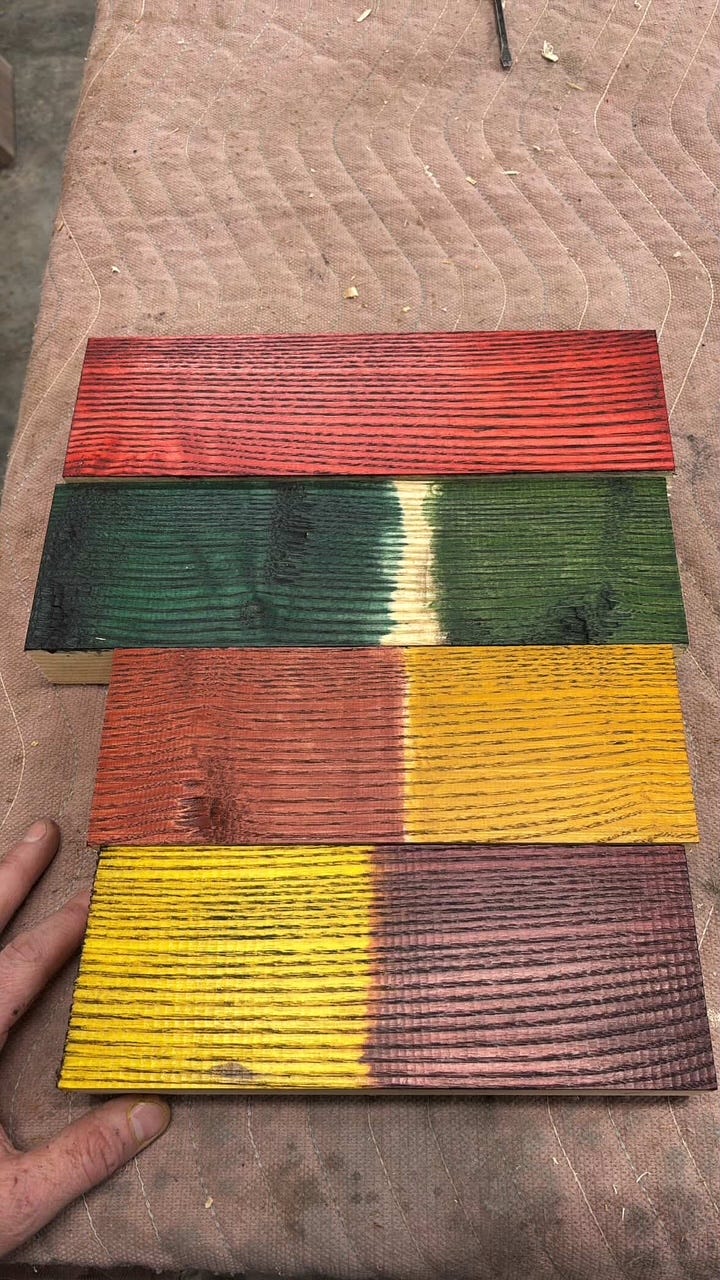
How well do these hold up to UV? Well I did these color samples with both Transtint aniline dye and Mixol oxide dye on Ash. They are sealed and top coated then cerused with black wax. I’ve set them in my office window sill this past fall which gets a good amount of sun and am actually surprised. The Transtint colors have slightly faded but the Mixol oxide is still as strong as day one. We shall see how they hold up over the next few years.
So far I think this is a route I’ll keep exploring.
Interesting experimenting, Shea. Thanks for posting and please do share more as this progresses. I also like the idea of adding color but do not like painting. Despite how accessible and fascinating Nick Kroll and others have made using milk paint recently - and it can be lovely - I always find painting to just feel like ‘work’ that I’m about 5K hours short of being any good at.
Very interesting article and approach, the colors look really vibrant! Looking forward to more on this.
And just to re-up my known bias, regarding the curing issue you mentioned, fresh milk paint has essentially no cure time. Just needs to be dry to the touch. You can topcoat it (e.g soft wax) within minutes of the last coat.
Or just press it into service without a topcoat. Painted a stool quick last week in the morning; MIL had her white purse on it a few hours later without issues.
It will become more durable over the following days/weeks through carbonation of the lime (like mortar curing), but this happens passively and can work through a topcoat as well.
Short story long, I'm usually juggling kids and no workspace and a million other things—a fresh batch of milk paint is exactly the quick and easy option once you get the hang of it.
And if you want a more transparent effect, cut the lime down to 10 grams per batch. But of course dye has an advantage there, the results you shared look great.